Sometime after the routine office work you may like to sit idol in front of the greenery to remove the boringness and to relax in open environment to sooth your nerves. This DIY pallet Adirondack chair will be super comfortable to enjoy your leisure time just sit right back on it and catch the naturally occurring scenes. we have provided here complete guide and step by step instructions to build this chair at home without any major mistake.
You only need some pallet wood, wood glue and screws and also some cutting and measuring tools to do this creative work for a subtle manifestation of this pallet chair that is zero in budget. This pallet Adirondack chair looks amusing with a comfortable sitting bent and armrests really make you feel like a boss or a ruling personality. These pallet ideas for chairs are just ideal for outdoor sitting, relaxing and daydreaming and has amazing style to define your fashion sense!
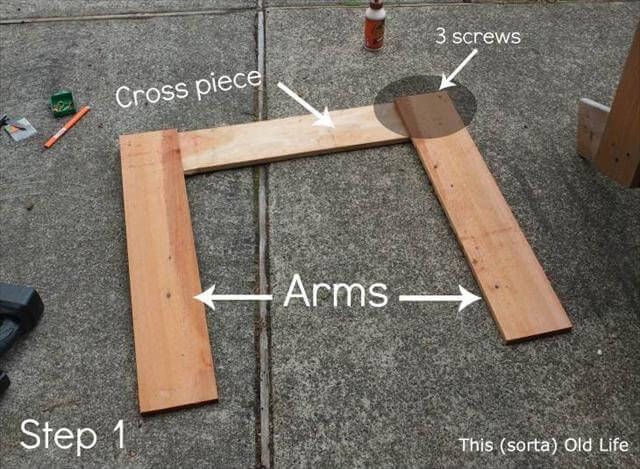
Deconstruct the pallet skids and put the individual handpicked planks on the floor as arms of the chair cut in accord. Fix the cross pieces and you have successfully completed the first step!
Sand the entire wood surface and edges for overall smoothness and put the screws the inside to get that lasting holding and grip.
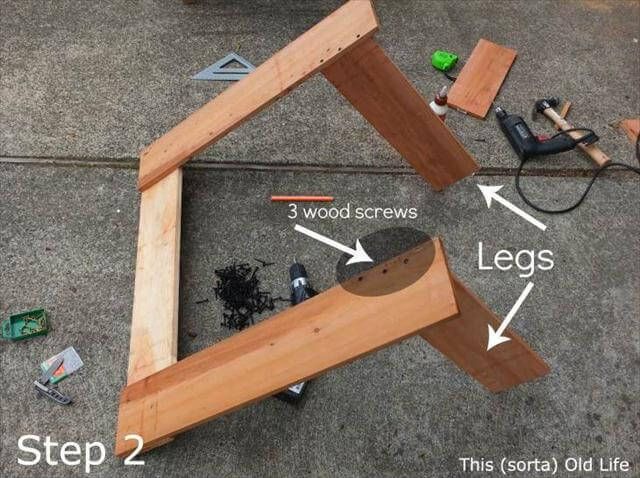
In step 2 you are required to put some legs to the previously made armrest section. Again visit the pile of separated pallets and get some study leg lengths to cut down to according sizes. Again put the screws to secure the legs firmly!!
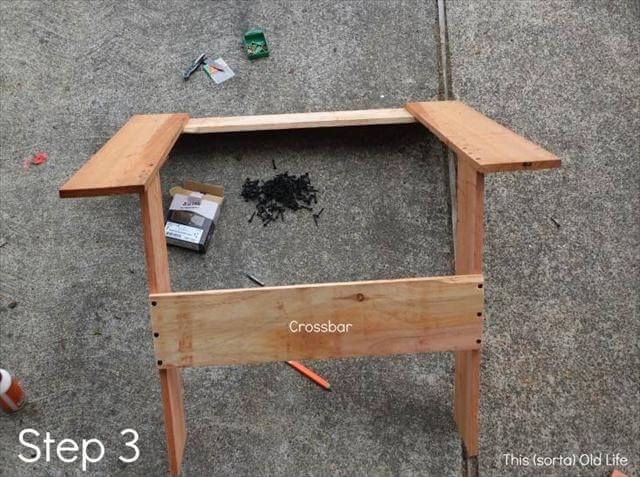
Move ahead to add further more support to the leg section and this can easily be done by fixing a crossbar as above pictured. Don’t forget to make it screwed too.
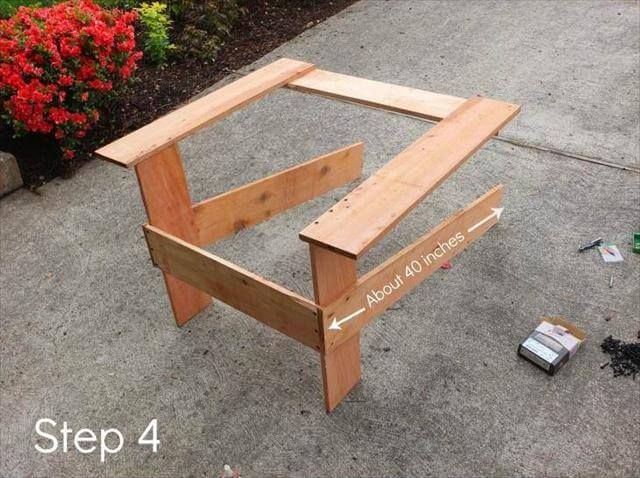
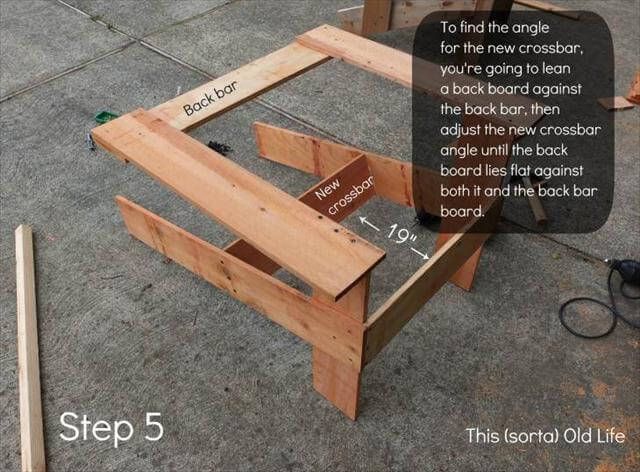
Now the most amazing part of the construction, the back bent and leaning legs. Pick two 40″ inches lengths from stripped up pallets and fixed them exactly where the cross bar has been attached to the legs section.
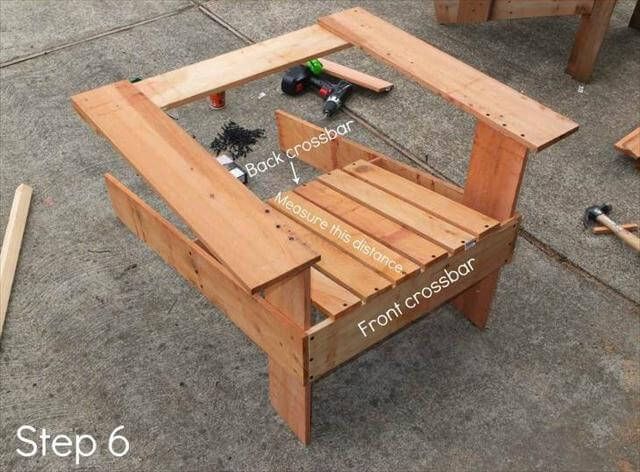
Cross supports to wooden furniture always put some extra strength to the entire structure. By leaving the 19″ inches from front leg cross bar, another crossbar has been fixed to the rear leaning back legs to enable them to handle the weight of that berth section! Keep on sanding the wood!
Now fill up the area between front and back crossbars by building a roof on them using a sturdy row of more cut down sizes from dismantled pallets. After you finish it off you will get that comfy seat of your chair for relaxed sitting!!
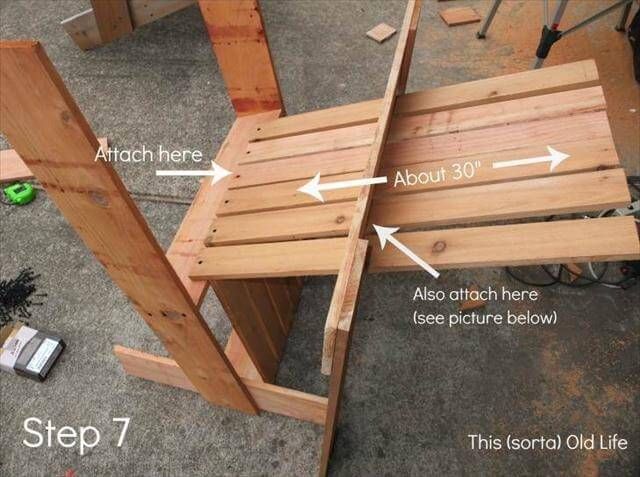
Now start adding the planks exactly where the berth section ends at the back crossbar. Raise the boards straight upward just right through the armrest sections to get your boss like backrest that will make your super comfortable while sitting back on this handmade yet stylish chair. 30″inches lengths of pallet boards would be enough to construct the backrest!!
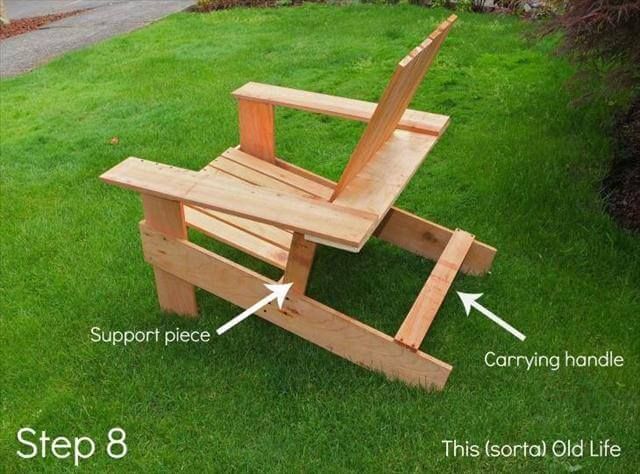
Just right after you completed the chair construction add the shown above supports to ensure more stability and also for easy carrying and handling of the chair. Be continue to use the sandpaper for awesome shine on the wood grains!
Now finally your have build your own super comfy chair or we have to say that you have made the pallets useful again!!This is the way for which the pallet wood desires to be used. Get inspired and give a genius spark to your thinking to unleash you creative mind and imaginations.
Visit your tool shed and be ready with your weapons to make this DIY pallet project of Adirondack chair duplicated for you leisure time sitting, daydreaming, book reading and relaxing!!

