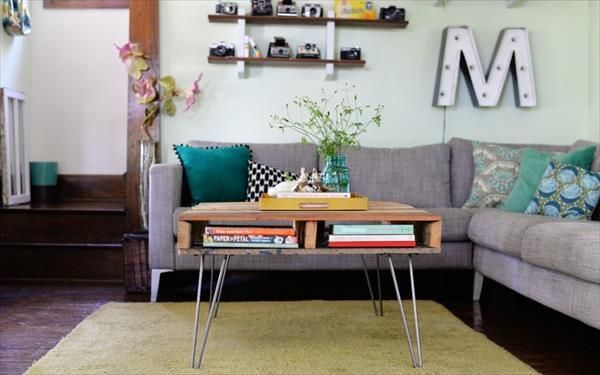
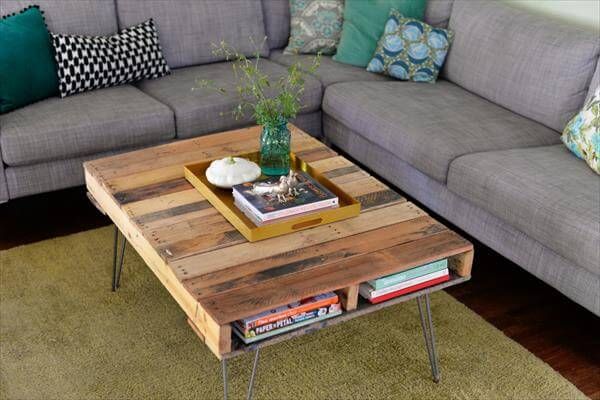
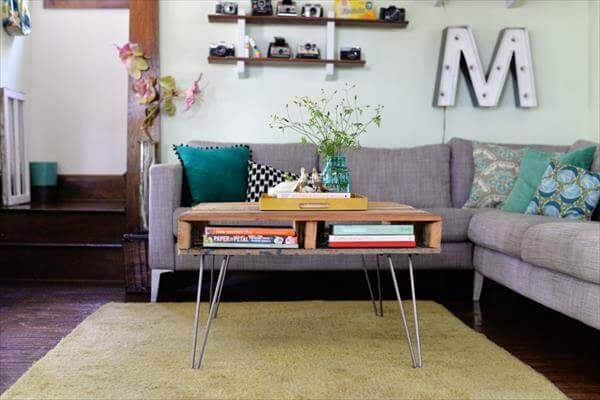
Hey!! Pallet lovers, are you looking for a new, no-brainer and cost-friendly project? If you really want a relaxing but serviceable DIY pallet project to be redone out of pallets then you are on the right place. Here we have explored a DIY pallet coffee table with hairpin legs which is much in serviceability and makes a fashionable furniture statement. You can set his table for living room beverage support; it will act also as a great conversation starter while you are sitting with your family and friends.
We have also reused some industrial metal scrap and pieces to get its electrifying metal legs. Pallet held much precious type of wood due to some certain reasons. It is highly endured, easily accessible and is just free of cost. As the pallet skids comes in big rectangular board shapes so it is also very easy to work with. We have also featured this DIY pallet table with storage capability that really dignified it in its serviceable trends.
Supplies and Material:
- Pallets (Where to get pallets?)
- Pry Bar
- Hand Saw
- Claw Hammer
- Hand Drill
- Hairpin Metal Legs
- Screws
- Paint Brush
- Varnish
- Stain (optional)
- Paint (optional)
This DIY pallet table which we have made for the living room has a graceful industrial style and can really get bigger compliments from the visitors as you are going to make it with you own creative hands.
Here is the supply material containing the tools and ingredients which you will be needed in this DIY pallet tutorial to craft this artful view of coffee table. All the tools are primary wooden tools and you may access them easily.
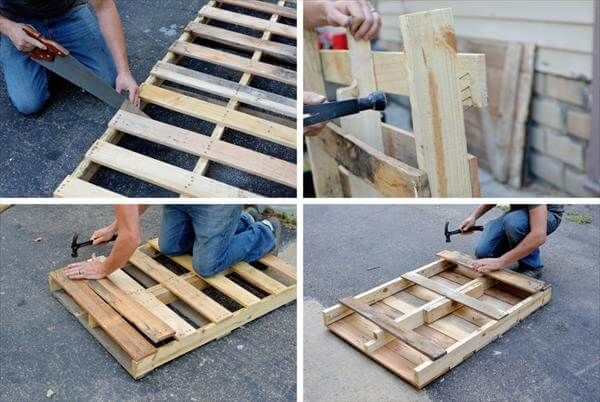
Start the framework by getting the pallet board trimmed in coffee table dimensions this can be done in multiple ways and depends on the nature of pallet skid which you have got.
If you have a bigger pallet then you need to saw it down first to a standard table size. For this purpose you cut the according size first and then pluck and replace the planks to get a perfect filled area for table top.
If you have got a little bit smaller size of the pallet skids then you don’t need to get then cut down to reduce the size as they have already an according size for a table. Then you just need to remove the planks from the bottom and then add them on the top to remove the spacing.
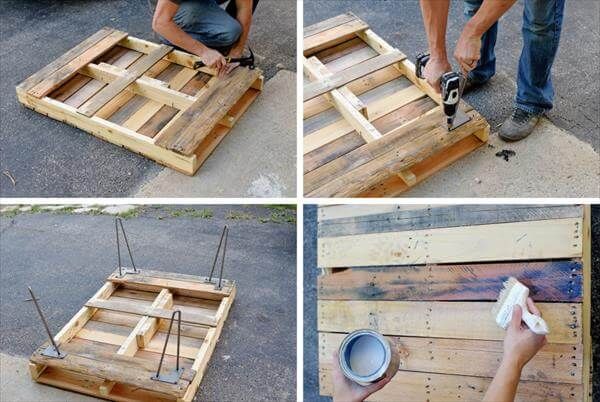
After getting a completely filled top, flip the pallet over and plan the space for attachment of industrial hairpin metal legs. Just attach some more planks at the bottom as you need some extra space to assemble the legs tightly without causing any cracks in wood.
Drill the holes first to attach the metal brackets which will be screwed afterwards.You can give a charming bend to legs by stretching the legs a little bit outward, this will allow a more graceful standing of it.
Layer the glue in between the pallet pieces to give a perfect and endured assemblage from inside. Glue always make wood more supporting and firmly gripped over another.
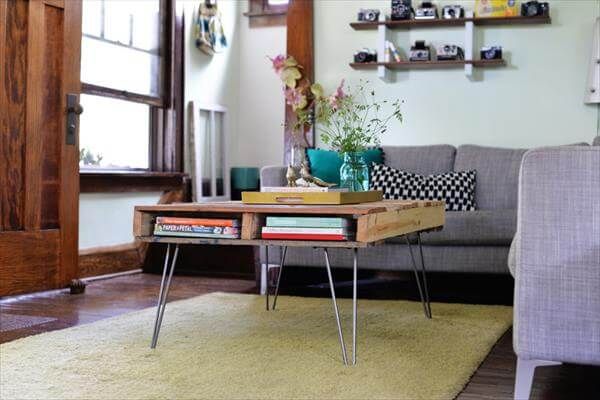
After finishing off the makeover of this hilarious and subtle manifestation of wooden table we gained an additional feature in it. It came up with a very secured type of storage space inside of it which can give a great holding to your readable books, mobile phones and other types of living room concerns.
We have also given few coats of varnish at the end for more charm on the wood grains. Varnish also makes the wood stand out with more dominant wooden impacts.
We really liked this natural wood shade of our table so we skipped the further paint to it. Stain would make the wood more lasting and sturdy and can be done at any time when you will feel free.
After getting the varnish dried the table is just ready to come inside of your living room. This fruitful and luxurious DIY pallet idea can really make you get with an swank type of utility furniture and you can provide elegance to any living space by using this vintage type of table.
We always welcome great and utilitarian pallet plans as these can change the life of a common person by delivering the luxurious furniture items on a budget.

