It is summer season, the winds and winds storm are common and destroy a lot especially that of wood nature. It was storm last night which demolished a lot of useful in home and our deck was also one of that great things. The storm left behind a destroyed area containing a random hodgepodge of the the stones, wooden scrap and outdoor necessities. We found our outdoor front deck accent home and alone and tried to get it restored to a well-built and visually attractive and defined position, we have made use of pallet wood and some wooden slats.
We have formulate our deck with a best possible wood gradation in this home DIY project of DIY pallet deck enlargement, a great and most precious tip for home outdoor improvements. Pallet wood is easily gettable source of wood and is available free of cost most of the time. If you get it from another source like from DIY store they will charge you a very little to avoid that disturbing overload on your wallet. Shipping companies can make you a great access of pallet wood without paying.
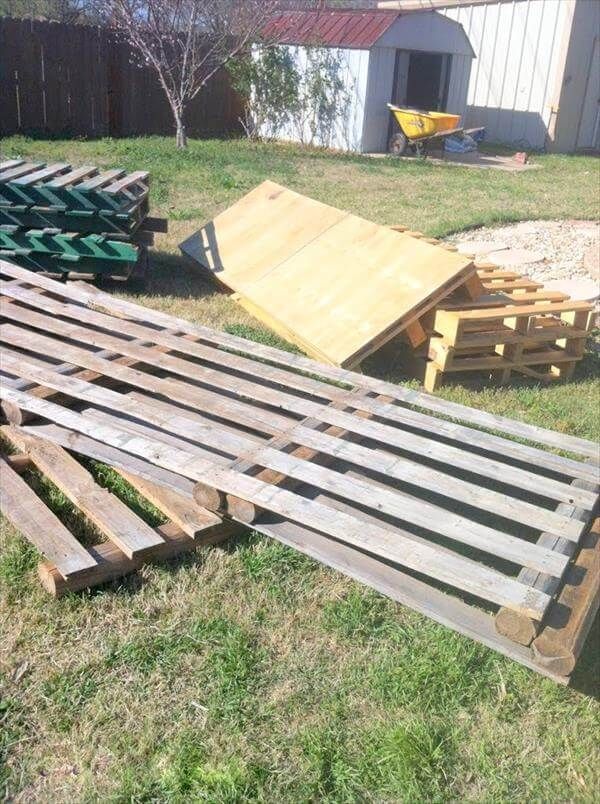
You can call it a 25$ project because we have got all this pallet in just 25$ from some very popular and respectable dealers of our area. Our supply for this rustic pallet contain all that of small and big size pallets and some plan wood like plywood to fill up the top of the pallet wholly.
Here it comes our deck on which we have stuck our eye to be renovated with pallets. First of all we setup the scattered things around the deck and put them on the deck and have completed cleaned the area before the deck. We level up the uneven space by putting up the paves and pebbles on the ground deep digs which have been formed due to retaining of water.
First of all we planned the area to have have perfect gradation of pallet banks and row. For this step we have started it off from the under area of the deck and have made it enlarged to the front with pallet skids. To make the junction firmly we have inner fixed the wooden support with nails to have a tight grip.
To make the pallet level even we have given them a base support of the flagstones which are in round shape. This will make the pallet fixed and immoveable while jumping randomly on them. Fix them perfectly beneath the corner and where the junction of the two pallets takes place. This will be repeated on each added row of pallet.
We have use here various electrical tool here like that of nail gun, hand drill and electrical wood cutters and electrical sanding tools. All we have used electrical in this DIY pallet project, it save lot of time and strength and also added the peak value precision in the framework. To get the pallet covered to give a smooth and plan area we have fixed additional wooden slats, which are fine enough to give an attractive display.
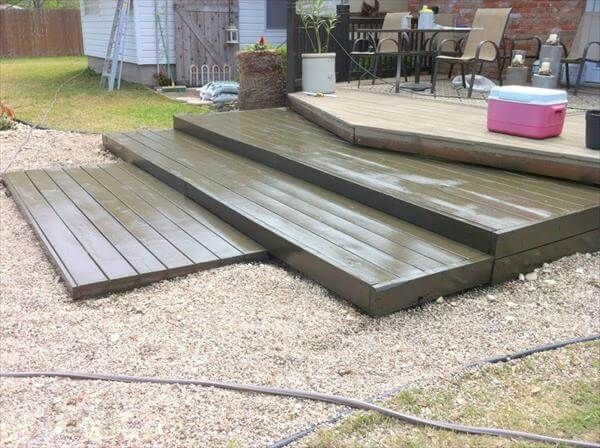
Here is what we have to get two wooden skids intermingled and assembled. We have provided them a junction with a wooden plank support fixed with nails, for more grip your can add them nuts able bolts to by drilling some holes and making them tight to desired extent. We have again provided that flagstone support under the second tier and row of stair for that lovely and beauteous enlargement of DIY pallet deck.
We have fixed and ending support to the first row with vertically aligned pallet plank to mark the finish of the first stair step. To make it well-gripped we have added some holes to fix up the screws through them to have reliable endurance. Make it fixed from both lower and upper sides with screws. To get that perfect plan shape, plywood can also be over fixed to the pallet frames to fill up the in between spaces too.
Just like the first tier we have finished the second one, make level fine and check it at every step with leveling tool to have that balanced gradation of pallet. The pebbles and soil will be useful in making the perfect level of the these pallet stair enlargements. Use small little odds and ends of the pallet wood remain to give support to the uneven and imbalanced edges of the wooden tiers
Now its time to add the final and third one stair layout to the deck which we have planned to be a little bit smarter that above two ones of the size. Add this one too in the same ways and plan a color wash to them to get them emerged in that personal theme and tint. You can get your family together to do this and get it coated with varnish or paint. We have layered the glue at the upper wooden fixed to have that inner strength.
To have that sharp and precised cutting the circular saw would be the best tool, fine edged cutting will be every thing for the appreciated display that wood be grace and charm raising compliment to home accent.
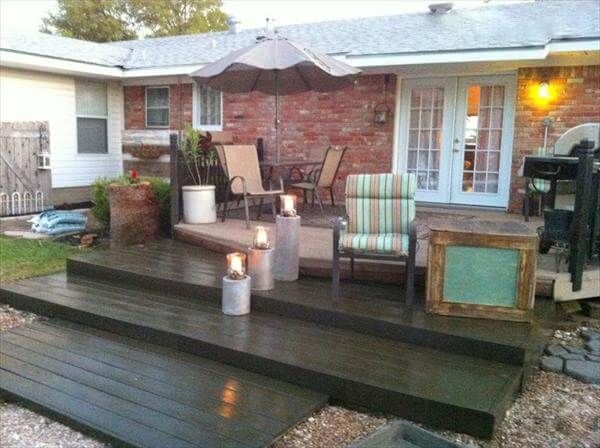
We gave given it a nice color theme with solid dark stained done with hand-rubbing at home. This would also make the surface more powerful and endured to be with a for a long long time and many years to come. Fill up the sides with side pebbles mixed with soil to get them tight enough and to be held at a one fixed space even we jump on it. After making it stained, let it dry for some time for nice gripping of wood and stain.
Now its time to give it a nice and overwhelming finish. The finishing and garnishing is always a heart’s choice subject and goes with your own creative and personal thinking and desires to change the aspects around any thing into your fantasy. We have added three light lamps and gifts to give a sparkling and twinkling touch to our pallet deck renovation. You can spruced it up with many other nice ideas that your creative mind thinks and increase their number too.


